Or, How to upgrade
Symantec Endpoint Protection Manager Server?
Or, Step by step
Upgrade guide for Symantec Endpoint Protection Manager (SEPM).
Descriptions: This
article will guide you through “How to upgrade the Symantec Endpoint Protection
Manager” and what all the prerequisites you should be having before proceeding
to upgrade your SEPM server. Upgrading
SEPM is not just about upgrading the Server; you will have to upgrade the SEP
clients as well. This is well explained in my other article “How to auto
upgrade Symantec clients after upgrading SEPM Server?”…
Please check it out here (How to Deploy Auto Upgrade of Symantec Endpoint Clients?).
Prerequisites:
1. Download RU6 version from below Symantec URL (better to
download full version):


2. If you are running this SEPM server on Virtual Machine,
please take a snapshot (http://www.techiessphere.com/2016/06/how-to-take-vms-snapshot-and-restore-vm.html
).
If using on physical machine, please take backup of
following files before you start with SEPM upgrade:
C:\Program Files (x86)\Symantec\Symantec Endpoint Protection
Manager\apache\conf

3. You can pick any of the latest file from below path:
C:\Program
Files (x86)\Symantec\Symantec Endpoint Protection Manager\Server Private Key
Backup

4. You can pick any of the latest Backup File from below path:
C:\Program Files (x86)\Symantec\Symantec Endpoint Protection
Manager\data\backup

5. Overview of prerequisites
(you must have with you), have a look:

Upgrade Steps:
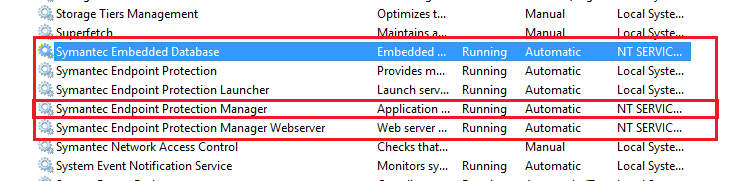
1. Open Services.msc
(go to RUN > type Services.msc > Hit Enter).

2. First Stop, Symantec Endpoint protection Manager Service, then stop all other SEPM related Services.
3. Now Run the Setup.exe (do Run as Administrator) of latest downloaded SEPM Installation Package.

4. Click Yes, If UAC prompted.

5. Click on “Install Symantec Endpoint Protection”

6. Click Next

7. Click Next

8. Check on “I accept the terms in the license agreement” > Click Next

9. Click Next (if you want to take Database Backup again, you can do it from here as well).

10. Click Next

11. Wait for the Installation to be completed, this may take several minutes.

12. Click Next

13. Click Next

14. Check on “Run LiveUpdate during upgrade” > Click Next

15. Wait for the Server Upgrade Process to be completed.

16. Click Next

17. Once the Upgrade Completed, you will be able to see the below “Upgrade Succeeded” windows > Click on Finish

18. Launch Your SEPM Server Console > Login with your ID and Password to see if everything is working fine.

19. If you login to the SEPM server console just after completing the Upgrade, the AV client update status will be appearing like below.

IMP Note: The Second stage is to schedule automatic upgrade of all SEP agents across the organization. You can check this below article to know how to schedule automatic update all SEP agent across the organization (This is must to do activity after upgrading SEPM server).
Article: How to
Deploy Auto Upgrade of Symantec Endpoint Clients?)
Cheers! Let me know if you have any query of feedback on this.